Custom Causes
Overview
When Causely receives an alert that it does not automatically recognize as a known symptom, you can define a custom cause to tell Causely what that alert means. Once defined, every time that alert fires, Causely surfaces it as a root cause with your description and recommended remediation, connects it to any related existing root causes in the causal graph, and clears it automatically when the alert resolves.
Custom causes let you bring institutional knowledge about your system into Causely's causal reasoning without writing code or modifying Causely's built-in causal models.
Prerequisites
Before creating a custom cause, verify that the alert carries enough label information for Causely to identify which entity it belongs to. In the Integrations → Alerts view, enable the Entity Only filter to see only alerts that meet this requirement.
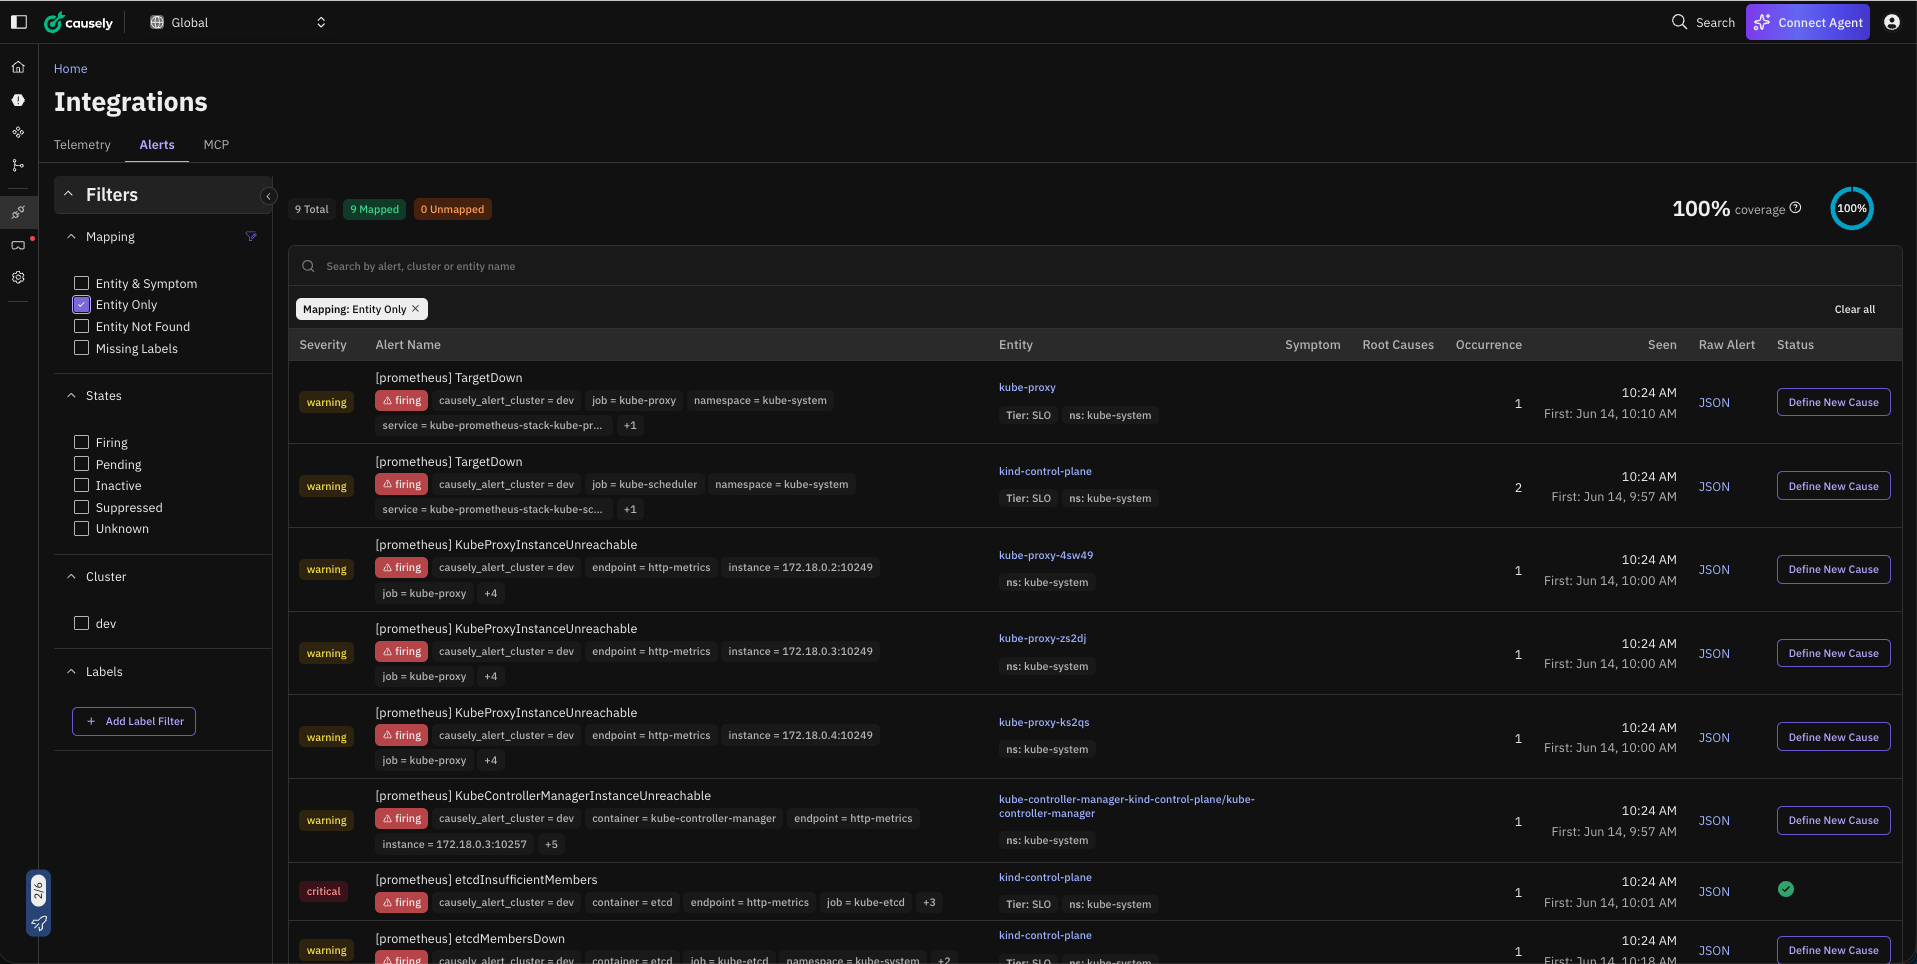
Alerts that appear in this filtered view are already resolved to a specific entity in your topology. Alerts that do not appear are missing required labels and cannot be used for custom causes until their labels are corrected.
For the exact label combinations required per entity type, please see Required label combinations by entity type.
Creating a custom cause
From the Integrations → Alerts view, click Define New Cause on any alert row, or go directly to Settings → User Defined Causes and click Define New Cause.
Choose a category
Causely uses the category to understand the failure mode the cause represents. Select one:
- Error (may cause malfunction): the alert indicates a problem that causes errors or downtime on the affected entity.
- Latency (may cause congestion): the alert indicates a problem that causes increased response time or throughput degradation.
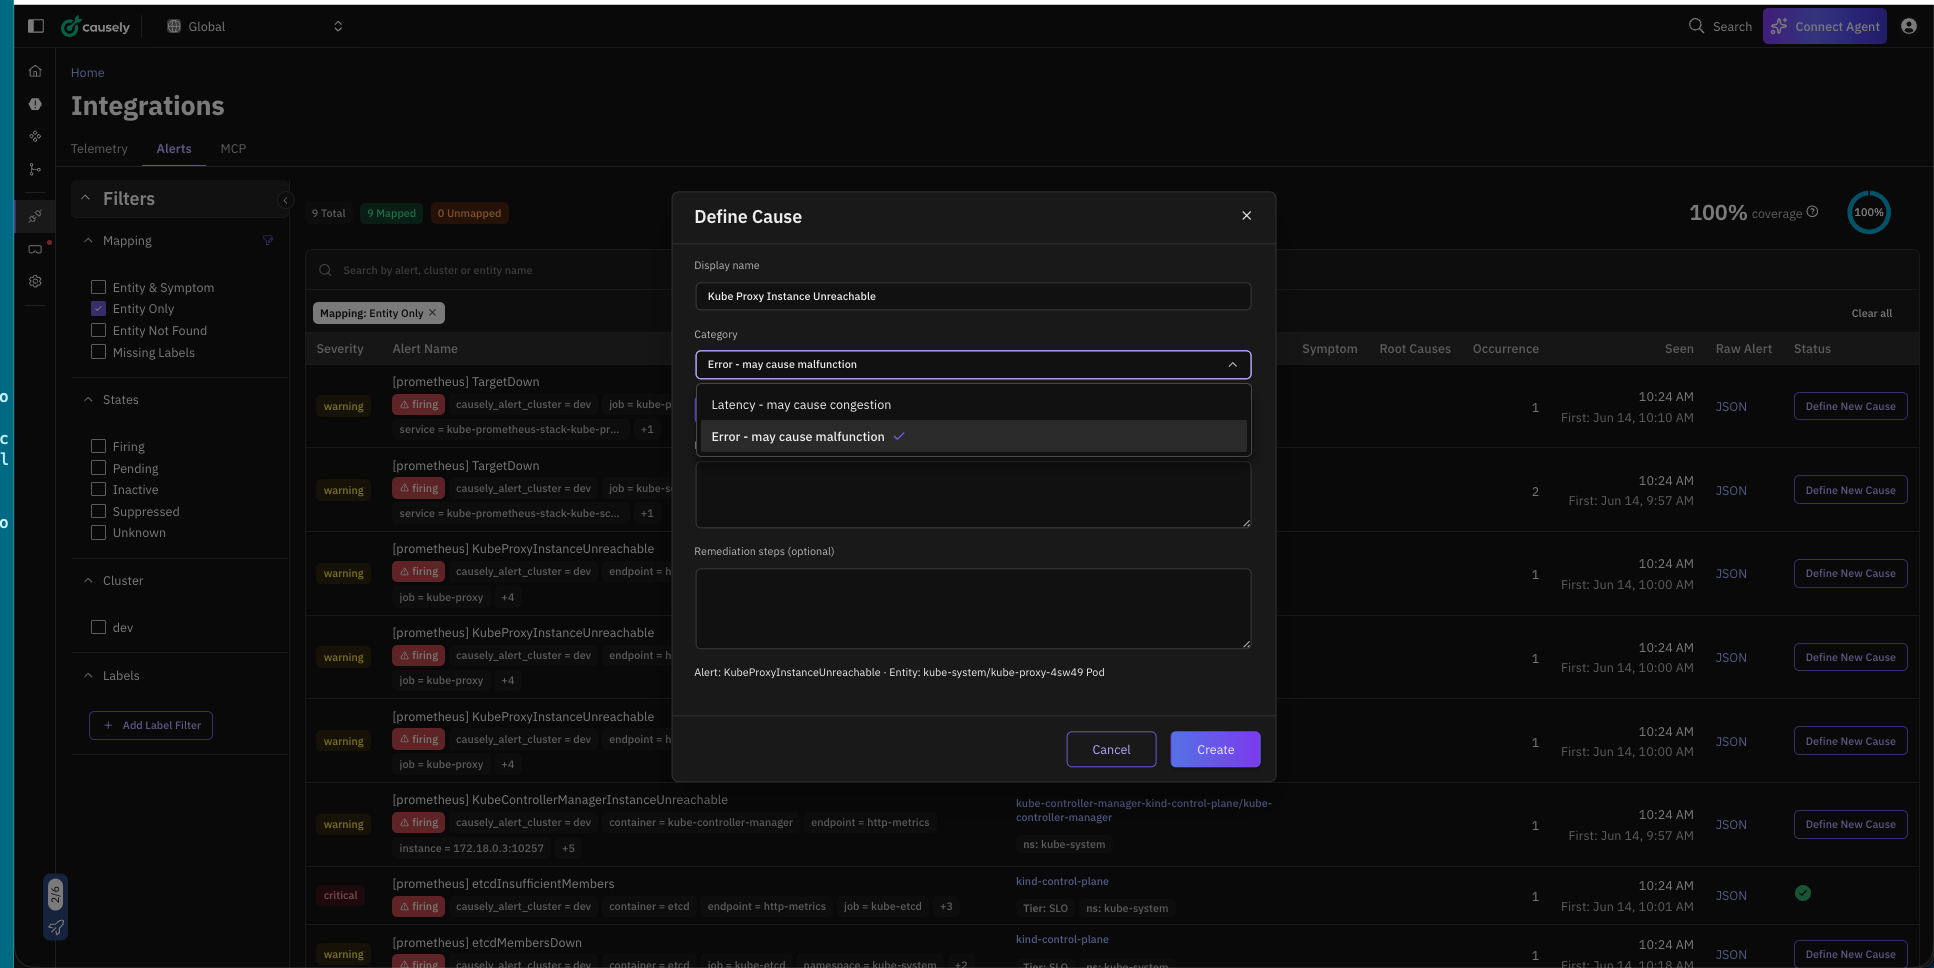
The category determines how Causely weighs the cause in causal analysis and how it is presented in the UI.
Add description and remediation
You can write a description and remediation steps manually, or use the Generate description and remediation with AI button to have Causely draft them based on the cause name and alert context.
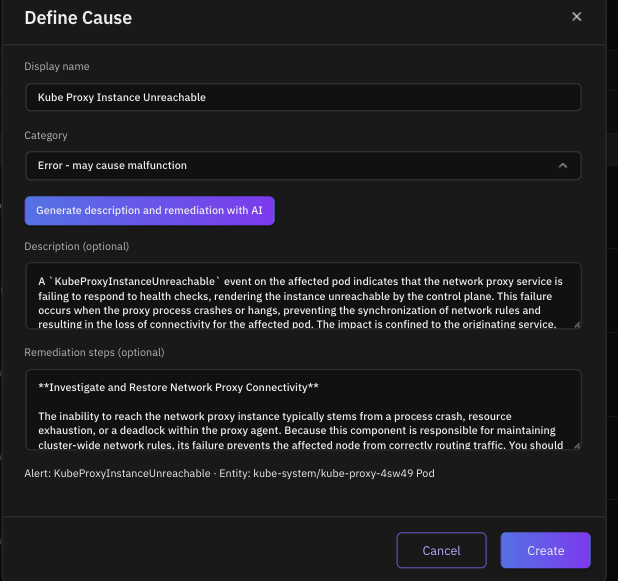
If AI generation fails or produces an unsatisfactory result, you can trigger it again at any time from the cause detail view after saving.
Click Create when done. The definition is active immediately with no restart required.
Managing your causes
All defined causes are listed under Settings → User Defined Causes, showing the cause name, matched alert name, category, creator, and creation date.
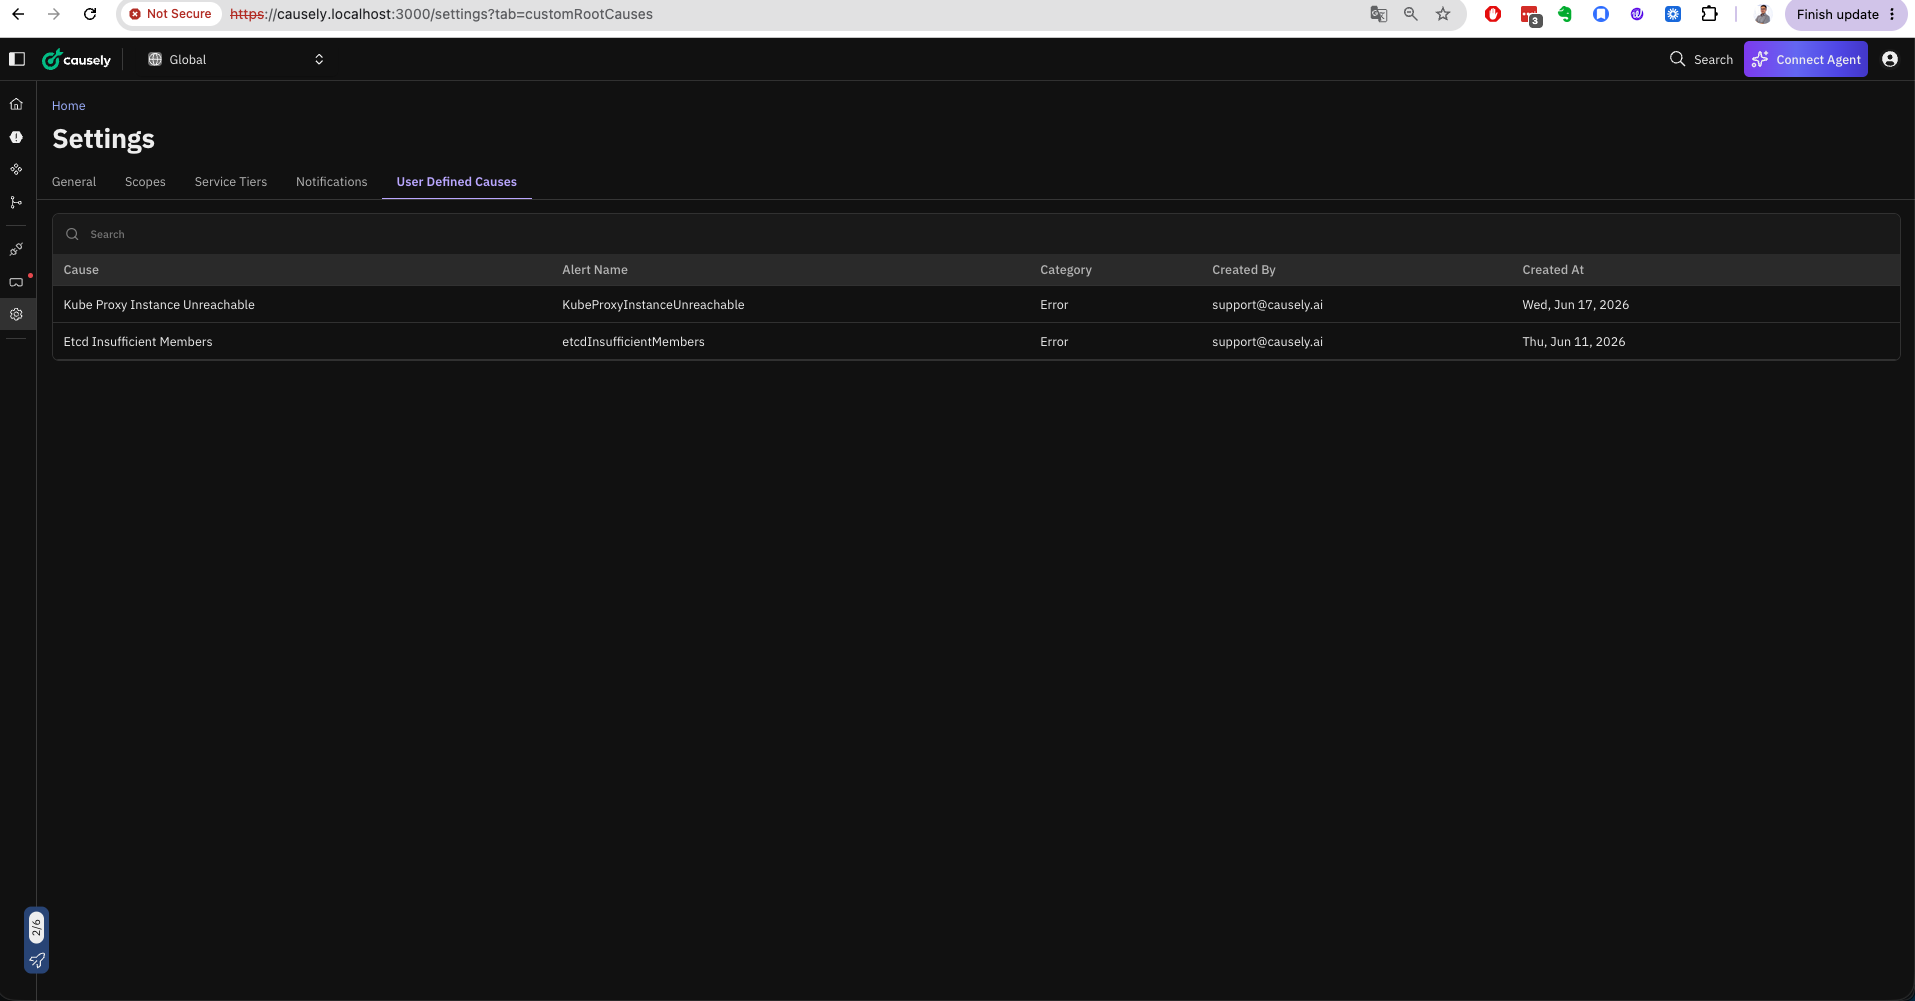
Click any row to edit the display name, description, or remediation. Changes take effect on the next analysis cycle (~30 seconds). The alert name and category cannot be changed after creation. Delete and recreate the definition if you need to change those.
How active causes appear
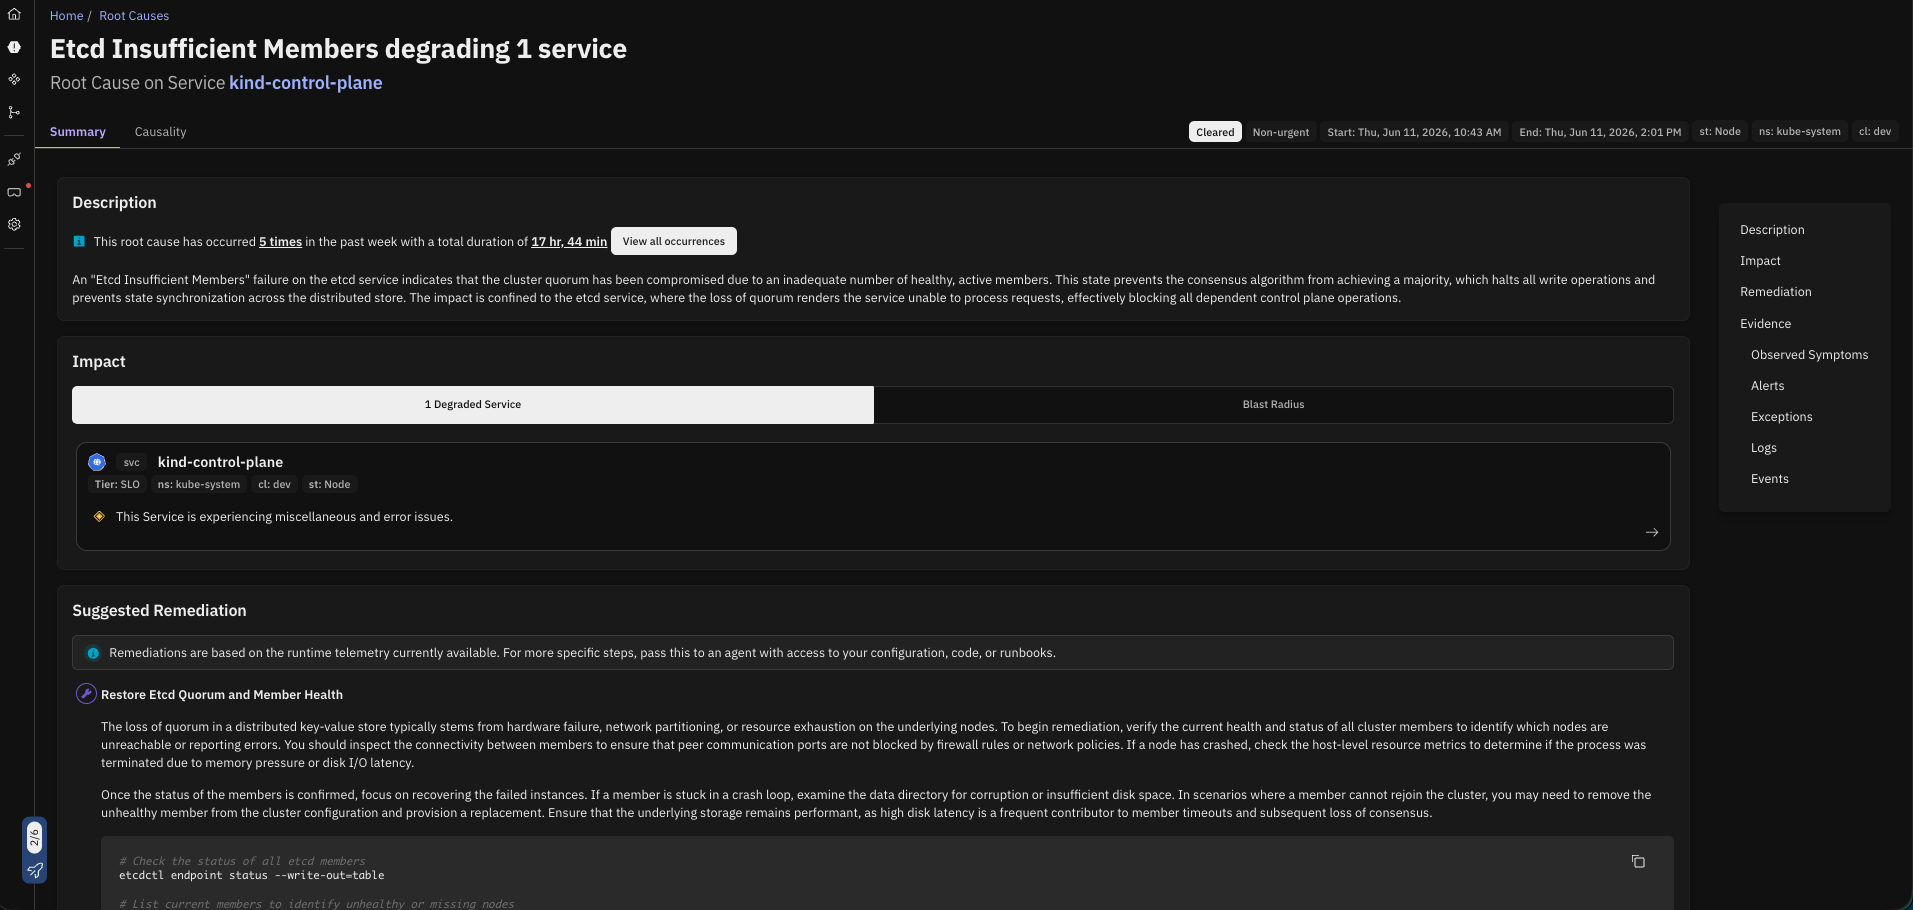
When an alert matching a custom cause fires, Causely surfaces it as an active root cause alongside built-in causes.

Clicking through to a cause shows the full detail view: description, impact graph, and the remediation steps you defined (or that were AI-generated).
If the same alert fires on multiple entities simultaneously, the cause appears independently on each affected entity.
Deleting a cause
Deleting a custom cause definition immediately clears any active instance of that cause across all entities. It will not reappear even if the underlying alert is still firing.