GCP Quickstart Guide
This quickstart guide will help you get Causely up and running on GCP. This setup deploys Causely in your Kubernetes cluster (including GKE) with eBPF instrumentation enabled, and connects it to your GCP project to monitor cloud resources.
Get Your Installation Command
- Log in to the Causely portal.
- Visit the mediators page.
- Click the "Add new" button (or "Add ➕" button) on the mediators page.
- In the instructions panel, you'll see the Helm installation command with your access token pre-filled.
- Copy the complete Helm command. It will look similar to the example below.
The command you copy will include your specific access token and cluster name. Here's what it typically looks like:
export CAUSELY_TOKEN=<your_token>
export CAUSELY_CLUSTER_NAME=<your_cluster_name>
export CAUSELY_VERSION=<version>
helm upgrade --install causely \\
  --create-namespace oci://us-docker.pkg.dev/public-causely/public/causely \\
  --version "${CAUSELY_VERSION}" \\
  --namespace=causely \\
  --set image.tag="${CAUSELY_VERSION}" \\
  --set global.cluster_name="\${CAUSELY_CLUSTER_NAME}" \\
  --set mediator.gateway.token="\${CAUSELY_TOKEN}"
Screenshots of the mediators page, "Add new" button, and instructions panel will be added here.
Run the Installation Command
- Open a terminal with
kubectlconfigured to access your Kubernetes cluster. - Paste and run the Helm command you copied from the portal.
- Wait for the installation to complete:
kubectl wait --for=condition=Ready pod -l app.kubernetes.io/part-of=causely -n causely --timeout=300s
By default, Causely will use eBPF-based instrumentation to automatically instrument your applications running in Kubernetes. This provides zero-effort observability without code changes.
Connect Your GCP Project
Now you need to configure Causely to monitor your GCP resources. You'll need a Service Account with Viewer permissions on the projects you want to monitor.
Step 5a: Create a Service Account
Use the gcloud CLI to create a Service Account:
gcloud iam service-accounts create causely \
  --description="Causely service account" \
  --display-name="Causely"

gcloud projects add-iam-policy-binding PROJECT_ID \
  --member="serviceAccount:causely@PROJECT_ID.iam.gserviceaccount.com" \
  --role="roles/viewer"

gcloud projects add-iam-policy-binding PROJECT_ID \
  --member="serviceAccount:causely@PROJECT_ID.iam.gserviceaccount.com" \
  --role="roles/monitoring.viewer"

gcloud projects add-iam-policy-binding PROJECT_ID \
  --member="serviceAccount:causely@PROJECT_ID.iam.gserviceaccount.com" \
  --role="roles/bigtable.viewer"
Step 5b: Create and Download Service Account Key
Create a key for the Service Account and download it:
gcloud iam service-accounts keys create service_account.json \
  --iam-account=causely@PROJECT_ID.iam.gserviceaccount.com
Step 5c: Create a Kubernetes Secret
Save the Service Account credentials in a Kubernetes Secret:
kubectl create secret --namespace causely generic gcp-credentials \
  --from-file=service_account.json=service_account.json \
  --from-literal=project_id=PROJECT_ID
Step 5d: Update Causely Configuration
Update your causely-values.yaml to enable GCP scraping:
global:
  cluster_name: <your_cluster_name>
mediator:
  gateway:
    token: <your_token>
scrapers:
  gcp:
    enabled: true
    projects:
      - secretName: gcp-credentials
        namespace: causely
Then upgrade your installation:
helm upgrade --install causely \\
  --namespace=causely \\
  --values causely-values.yaml \\
  oci://us-docker.pkg.dev/public-causely/public/causely \\
  --version "${CAUSELY_VERSION}"
You can also use credentials autodiscovery by labeling the secret:
kubectl --namespace causely label secret gcp-credentials "causely.ai/scraper=GCP"
This allows you to add new projects without editing the configuration. See the GCP integration documentation for more details.
For complete setup instructions and information about which GCP resources are supported, see the GCP integration documentation.
What to Expect
Once configured, Causely will:
-
Monitor Kubernetes services: Using eBPF instrumentation, Causely automatically discovers and monitors services running in your Kubernetes cluster.
-
Monitor GCP resources: Causely will discover and monitor GCP resources including:
- Compute Engine instances
- Cloud SQL databases
- Cloud Storage
- Bigtable
- And more
-
Unified view: Causely creates a unified topology showing relationships between your Kubernetes services and GCP resources.
-
Show data in the UI: Within a few minutes, you should start seeing entities appearing in the Causely UI at https://portal.causely.app.
Add More Telemetry Sources
To help Causely infer Diagnoses more effectively, connect additional telemetry sources. Visit the Telemetry Sources page to learn about the data sources that Causely supports, including:
- Prometheus
- OpenTelemetry
- Grafana
- Alertmanager
- And many more
Review Discovery
You have successfully installed Causely! Navigate to https://portal.causely.app to verify your environment has been discovered. You should see entities populated in the Topology view:
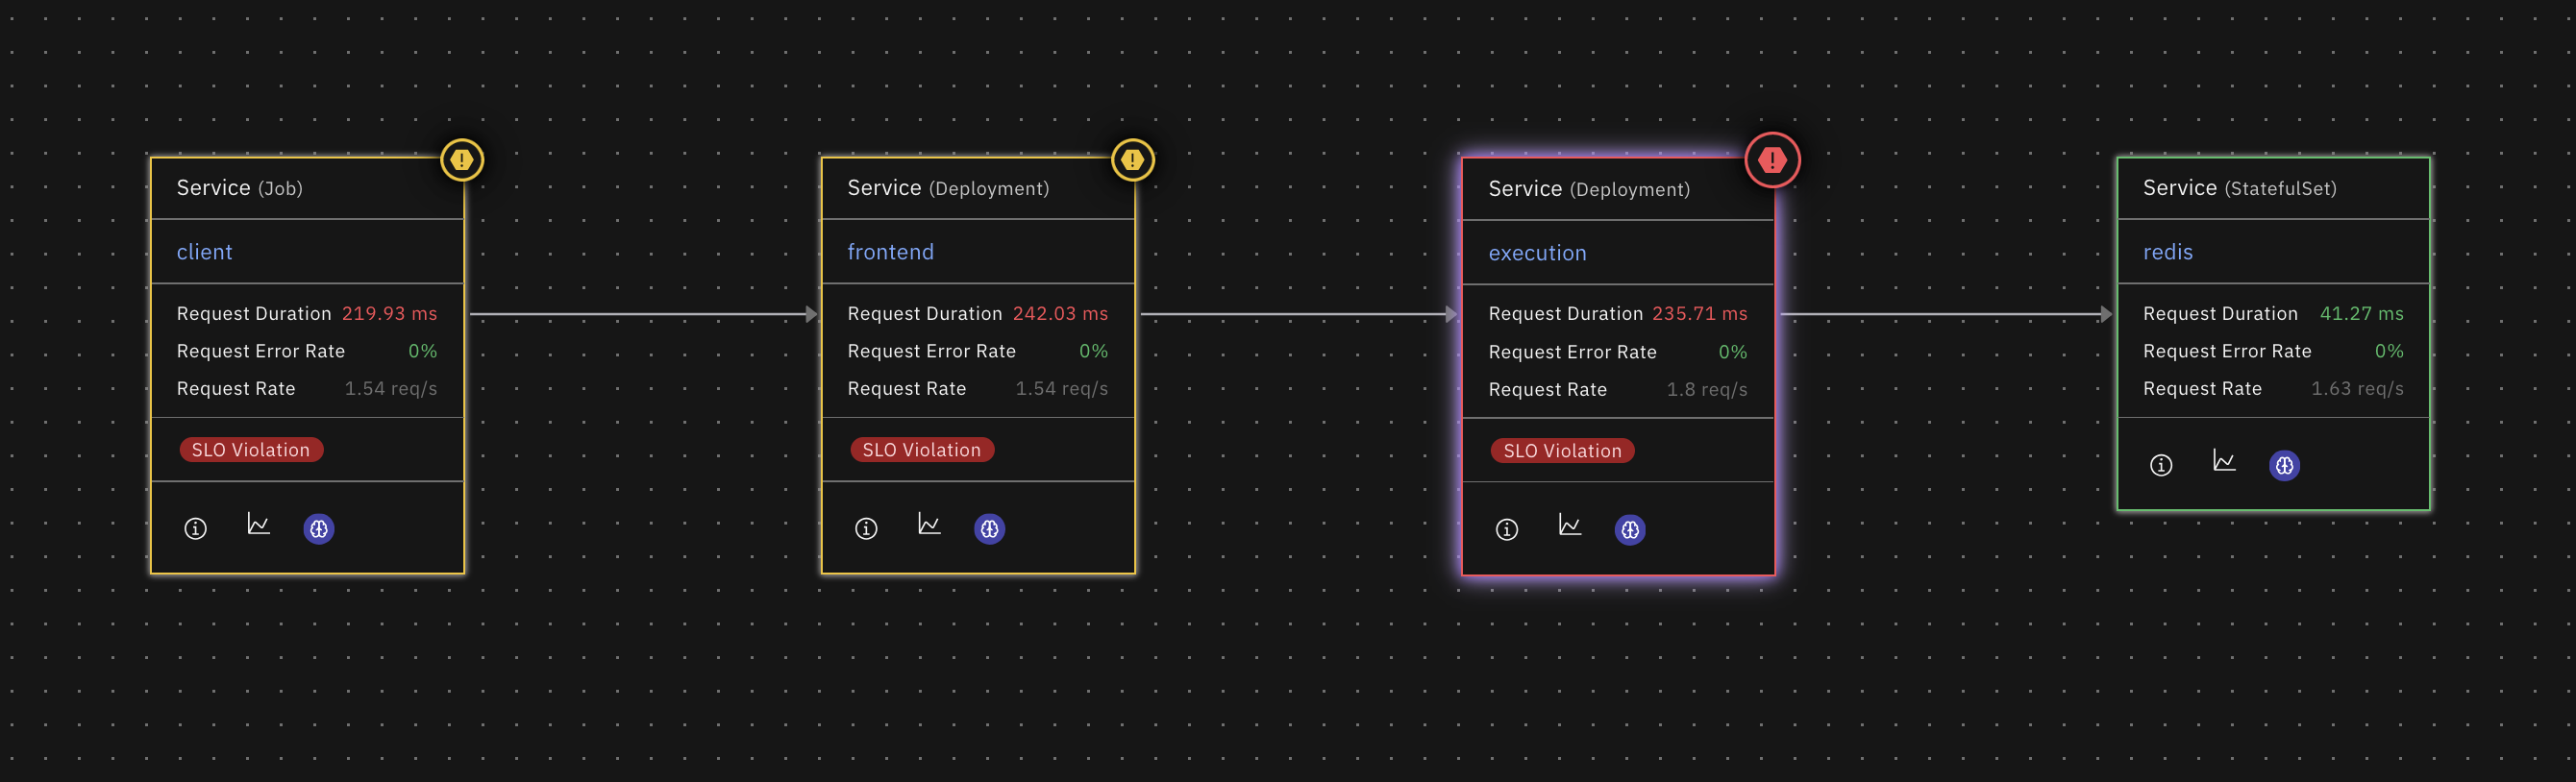
If the entities and connections you are expecting to see are not appearing, go to the Integrations page and check for any errors for the telemetry sources you have configured.

Errors in the integrations page will prevent Causely from discovering entities and connections in your environment. Follow the troubleshooting steps to resolve the errors.
Connect Causely to AI Agents
Give your agents access to Causely's causal model via the MCP server. Any MCP-compatible agent or assistant including Claude Code, Cursor, VS Code, HolmesGPT, or your own custom agent, can query root causes, service health, dependency maps, and reliability reports directly.
Visit the agent integration page to get started.
While this quickstart guide focuses on Kubernetes, Causely also supports:
- Container Orchestration: Nomad, Docker, ECS
- GitOps: Argo CD, Flux
- Virtual Machines: Direct installation on VMs
For detailed installation instructions for these platforms, visit the Installation Overview page.